Category Archives: Tips

Behind the Scenes of my Favourite Selfie Photo Shoot Spot

behindthescenes600

Want to know more about what happens behind the scenes of a Selfie Photo Shoot?

I’ve shared a some behind the scenes before like this one where I share all the outtakes of a photo shoot but in this case I really wanted to tell you  a bit about finding a location for a selfie photo shoot.

I know it’s easy to see a photo someone takes and assume it was simple and easy.  Or that in order to you to make that happen you’d have to go to that perfect spot, on a really good hair day in that outfit that you have yet to find, on a day you really feel good about your body. Then it becomes one of those things on our list of someday…right?

It’s easy to think that everyone is finding these dreamy locations right? But we aren’t. Most of us are making the most of the places we can find and are just going for it.  Thats truly the difference in between someone with a camera full of awesome photos they took for their business or blog and those who don’t!

So here’s a bit of the behind the scenes about how I make this one work for me!  But first, let’s break it down.

It looks serene doesn’t it?  Like I’m in a forest way out in the country.

You’re hearing birds chirping and the wind blowing through the trees, right?

Not so much.

Here’s the truth.

I ride my bike out to this spot and park it, seeing what exact spot seems right on this day.  To the right of me in the photo is a small creek with this trail built beside it.  It’s lovely and thankfully not so picturesque that this is a really busy spot.  To my left is a small patch of forest.  While its lush enough to be a backdrop for photos, for much of it I can see through to the gigantic office buildings on the other side.

Behind me, and at the other end of the path are two very busy roads. So I don’t hear any bird chirping or wind blowing.  It’s beeping of horns, car doors slamming in the office parking lots just past the forest.

While it is a generally quiet path, every 5 minutes or so someone comes by running or taking a walk on their lunch.  They generally don’t ask too many questions, but it isn’t completely quiet.  There is also a path along the other side of the creek but I often forget that it is there until someone is walking by on the other side, with me in full view jumping and twirling in front of my camera!

But it’s a place I can get to, on my bike that while it may not be perfect, or as serene as it looks…it doesn’t need to be the perfect spot to be a great place to rock a selfie photo shoot.

Why? Because  if we wait for a place that is ‘perfect’ or totally serene…we’ll keep putting this off until ‘someday’ but really the imperfectly awesome location might be exactly what we need to take those photos that will help us rock our blog our business!

I hope this might make you look around you a bit differently and spot some selfie photo shoots you might otherwise overlook!

P.S. If you didn’t get your 72 Hours to Gather Your Superpowers Bundle?  It’s not too late to in on this amazing offer!

72-hours-bookshelf-banner21

Tips for Using the New iPhone Timer!

iphonetimerviviennemcmaster600

One of my favourite photo tools these days is indeed my iPhone and I was THRILLED to see that with the new phone the iPhone 6 coming out today there was going to be a self-timer added to the camera. While I’d love to get it someday, I still have a lot of time on my plan for this iPhone 5 I was extra excited to find out yesterday that the timer was a part of the new upgrade in the operating system too.

So of course I had to do it right away.

As a self-portrait teacher & taker, a timer is pivotal. Especially in the way I like to take selfies which is to put down the camera and step into the frame. I’ve been singing the praises of the Gorillacam App for years now and still will probably use the App more than this timer but I’m so thrilled to now have both.

For those of you who use Google or Windows phones…you’re lucky ’cause you’ve had a timer on your phone since the beginning. More than that, these phones also seem to have a burst mode (which the iPhone upgrade is lacking and why I will still mostly be using the Gorillacam App still). If you see a burst mode option, try it!  What that means is that it can take a whole bunch of photos one after another. This is so wonderful when you are stepping into the frame as you don’t need to run back and forth pressing the shutter each time!

So let’s talk about the iPhone!  While these new features are pretty simple to use, I thought I’d share this here because, well….Apple doesn’t give you too much instruction on where new things are.  While that’s okay because it is pretty intuitive to use, I found that many folks didn’t know the features I mentioned in the 10 Ways to take Better iPhone Photos post so I thought I might share a bit about this cool new way to use our iPhones for selfies.

You’ll find the timer at the top of the screen when you enter your camera (the basic camera on the phone, not through an App) right beside the Flash, HDR and where you turn the camera from front facing to back facing. They have 2 options for us, a 3 second timer and a 10 second timer.  Even with Gorillacam I love using a 10 second timer.  It’s just enough time to get into the frame!

timeriphonevivienne

In terms of the timer itself, one feature I really like which isn’t the case when using an App is that the flash on the back of your camera flashes to count down. Of course this is different if you are using the front facing camera, but in that case you’ll be able to see numbers pop up on the screen to count down!  Good on ya Apple for doing that!

As I’ve been using my phone for selfies, I’ve really come to realize that the camera on the back of the phone is much higher quality than the front facing one (where you can see yourself on the screen). So I almost always use that lens for taking selfies even though I can’t see myself on the screen. Being able to see yourself on the screen is great, and I recommend starting off using the timer that way but maybe flipping it around if you really love what you are getting so you can get some higher quality ones too (especially if you are noticing some graininess).

One place this upgrade is lacking though is with a burst mode. I mean, why add a timer without the ability to take more than one photo at once? It seems like that is indeed coming with the iPhone 6. I’m sure it was something they could have added to this upgrade but instead have it something you need to get the new phone for. Alas…that just means I’ll be getting more use out of the Gorillcam App as you can get it to take how ever many photos you’d like (up to 60 photos).

There are also a couple more new features on this ios8 upgrade that affect our cameras and I’m excited about them both.  One is that there is now a favourite button at the bottom of the screen when you are looking at each individual photo. I can’t tell you how many times I scroll and scroll for ages to find one certain photo.  So this will be such a great way to have one folder of the images we are most likely to want to refer to. The favourites end up in a favourite folder that you’ll see when you click on your camera roll.

The other feature is the deleted photos folder! It’s gonna be a lifesaver. Even today after I took the photos for this post I accidentally pressed the delete button when trying to send myself these photos and was mighty grateful to be able to go back and retrieve them!

iphonefeatures

I’ve been excited for the timer to become a new feature not just for my own use. I think a lot about selfies and both their history and their future (I can’t help it…I’m obsessed with the ways that selfies can be a tool to see ourselves with kindness). I have a big hope that people will experiment with the timer more and selfie culture will shift a bit more away from arms length and get us into the frame more. I truly believe that is where so much more of our healing of how we see ourselves can happen. I know the selfie trends have been in reflection of the developments in our gear (like when the front facing camera came and selfies took off because of it) so we’ll just have to wait and see what effect this has!

One more thing…if you do try using your timer today, I also wanted to share this post from the archives with you as it is one of my favourite self-compassion tools that makes using the timer even more fun!  I dare you to give it a try and if you do, use the #beyourownbeloved hashtag to share it with us!

Nextbyobeloved

Tips for Taking Travelling Selfies!

 travelselfies600

Last week, I had the pleasure of being on the road to go to Anna Guest-Jelly & Curvy Yoga’s Curve Camp.  I have a whole other post coming swooning over this event (it was INCREDIBLE) but alongside the event itself, my dear friend Liz Lamoreux and I added in a few extra days to really get the chance to soak up the Nashville experience.

It was such a hoot to get touristy and explore the city from that way and I took a LOT of photos and especially self-portraits along the way.  I though I might share with you some tips I have for taking travel selfies & how to really capture the visual story of your trip!

travel3

Embrace Your Touristiness

The fun thing about travelling, is that if we give ourselves the permission to….we can embrace being a tourist!  Now, I’m totally the type of traveller who usually likes to pretend I live there so I don’t always embrace my touristiness in an effort to blend in & try to experience the ‘everydayness’ of a city.  On this trip though…I definitely went all out touristy and it really made the trip.

In a place like downtown Nashville, it is tourist galore and it was easy to get unabashedly touristy (and really these days, its folks of all ages embracing the arms length selfie)!  One of my favourite ways to get touristy was to get ‘photobombed’ by all of the photos & statues of celebrities there.  As you can see, we had the Elvis photo but the fun continued as we got a pic of Rayna & Juliette (of the TV show Nashville) and of course Dolly Parton photobombing us too!  I dare you to try it next time the moment arises.  Was it potentially embarrassing? Heck yes…but sometimes these potentially embarrassing moments feel so freeing to do anyways and end up with big belly laughter (which makes for a good trip don’t you think)!

Of course, you can also play tourist in your own town too and just go for it!

travel1

Embrace all sorts of types of Selfies!

One of the easiest ways to take a selfie is to reach out our arms for an arms length photo.  As we’re travelling, we are also likely to find all sorts of opportunities for other types of selfie moments!

One of my favourite photos on the trip was seeing our long shadows when we went to the backstage tour of the Grand Ole Opry.  Its a fun way to get a group photo that is also low pressure! The photo on the right was a moment when I saw our reflections backlit in the Country Music Hall of Fame and asked Liz to pause with me to take the photo.  While I took many other selfies and photos in both of these experiences, these two are my favourite.  Sometimes when we capture the unexpected, it helps tell the story of our experience even more!

Reflections, shadows, aiming at our feet and putting down the camera are all great ways to break out of the mould of the arms length selfie when on our travelling adventures!

travel2

Take Group Photos

Oh my…this made my trip asking the participants if they’d join me in a group selfie! It can be a great way to get a little bit of folks we meet along the way, asking them to come along with us!

It might be someone we have a great chat with on the bus to our destination or a group we are travelling with!  One trick to getting lots of people in the photo is to have them be a bit further back in the photo (you know…in case you were wondering how we got everyone in this)!

travel5

Find Murals or Street Art

One of my favourite ways to get to know a city is to get to know its murals.  Whether it is a small town or a big city, murals often help a place share a part of its history in a visual way and it is a great way to get to more about where you are.  Places like Clarion Alley in San Francisco are full of murals, but quite honestly, there is rarely a town or city where I haven’t seen at least one.  They are everywhere!

In Nashville, I had heard there was a Johnny Cash mural and had hoped to find it.  I asked a few folks downtown if they knew where it was, but no one seemed to.  But then just when we had some time to spare, Liz & I happened to drive past it and were able to jump out of the car to take a few photos with it (the photo on the left was taken by Liz).

Not only does a mural tell us about the city, but it makes for a great drop back for photos!  So next time you are travelling and see a local mural, I dare you to go for it!

traveldiy

Find Makeshift Tripods

Most of us aren’t likely to have a tripod with us on all of our trips, so to be sure to add ourselves into the photo we can think about what I like to call DIY tripods! As in…a bench, or a rock, or a railing (a wide one that would be stable for your camera of course)!

I often simply put my camera on top of my camera purse as a soft place to rest it and also get that ‘from the ground’ perspective!

You can find out more about DIY tripods in the Beloved Camera E-Book!

travelstory

Tell the Visual Story of the Trip

One of the best things about getting our camera or phone out to take selfies & photos along the way is that we end up being able to look back at the visual story of our trip.  Of course, we’ll want to have a balance between taking photos and really experiencing the trip (not just seeing it from behind the camera) but I know that for me when I don’t pull out my camera here & there, I miss being able to see that part of the journey when I look back at it.

So whether it is simple moments like having a Sangria with a friend on the hottest day you’ve ever experienced or finding  heart shaped leaf on the ground just as you are leaving, we can take mere moments to snap a photo and add these into the story of our travels!

photowalklight

Take a Photo Walk

One other tip for taking travel selfies I have for you is to take a photo walk!  A photo walk can be as simple as taking your camera or phone out with you for a few minutes with no other intention than to capture a bit of the beauty around you and maybe even add yourself into it!  You just might find some gorgeous flowers to capture or want to pause in the beautiful morning or evening light!

It can be a great way to find some solo self-care time or for you early birds like me, to go on adventure while the rest of your travel crew continues to rest.


selfie300Want to learn to take better selfies?

Get the Selfie Starter Guide, a new E-Book from the Be Your Own Beloved Workshops!

This powerful 30 page E-Book will help answer both the creative and technical questions you might have around taking selfies!

Of course, being a Be Your Own Beloved E-Book it will also invite you to see yourself with kindness rather than critique!

7 Tips for Getting Through the Winter without Ditching Your Self-Portrait Practice

winterphotos

The rain has returned where I live and I know many of you in North America are dealing with a whole lot of snow! So I thought I’d share some tips with you for getting inspired to get yourself into the photo even if winter feels like it will never end (because, well…I think these are the things I need to remind myself of too).

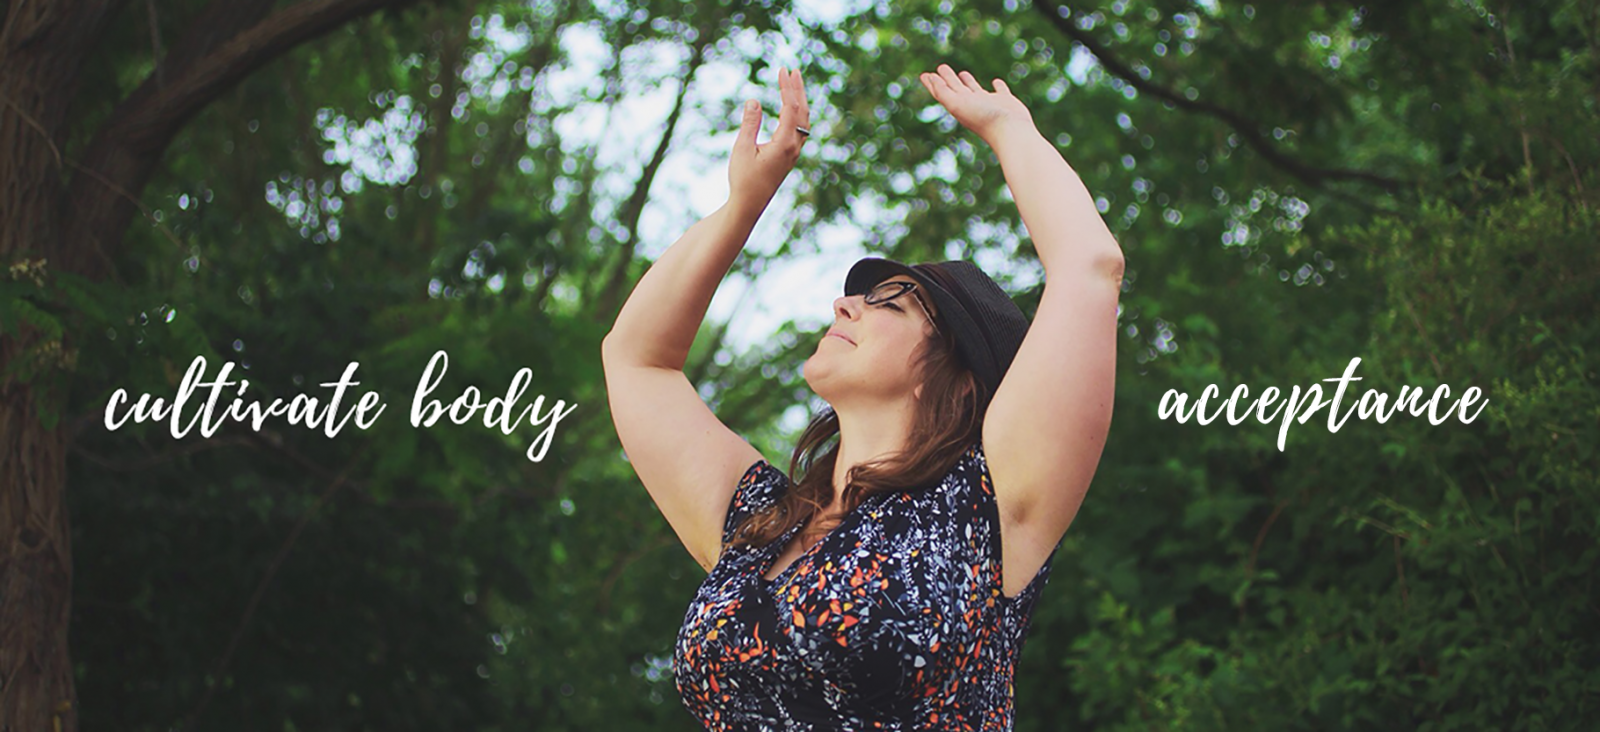
Celebrate What You’ve Got!

Rainy days with umbrellas? Your big snow boots walking through the snow?  Ourselves all bundled up in layers?  These are the truthful experiences of winter right?  Sure, we might wish for sunny days, but what about telling the story of right here right now?

The energizing energy of taking photos doesn’t only happen because we have nice weather…it is because we get our cameras out no matter what the weather and engage in it.

Plus, there are great things about winter weather. Cloudy days provide great balanced light and snow bounces light back at us to name a few. So lets celebrate what we do have.  In this session of  Be Your Own Beloved I’ve been so proud of the students getting out in the snow to do their course activities and I’ve been in awe of how beautiful their snowy photos are!   Okay…we might need to wear more practical footwear than I did in the above photo (I tell ya, it was dangerous…I was slipping around everywhere in those silly shoes) but lets celebrate the beauty of winter while it is here!

mountain silliness!

Seek the Colour that is around You

I know it can feel like everything is brown or grey or white (if you’re dealing with snow) but one trick that has really helped me is to focus on what colour is around us.

Natural things like:

  • Evergreen Trees & plants….what is still gorgeously green around you?  Get yourself surrounded by gorgeous green!
  • Bamboo! I often find it in a community or public garden and not only is it still green, it has a magical way of letting light pour through it! Standing near Bamboo or other gorgeous plants are a great backdrop or setting for your self-portrait!
  • Go to the Forest or to a Park as inspiration!

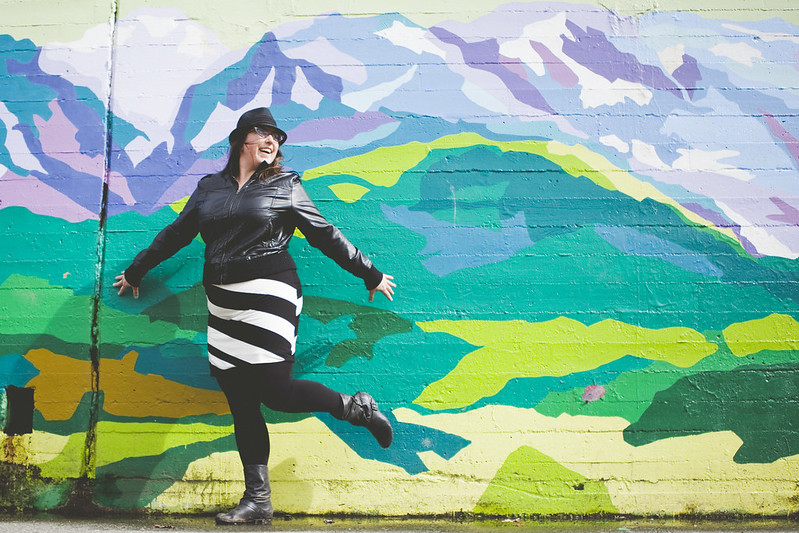
Or alternatively, you might notice the colourful things that are always around:

  • Murals to stand in front of !
  • Colourful Buildings to use as a backdrop?
  • Or BE the colour! Wear something bright and colourful and use the muted colours of this season to stand out in the photo! 

crocus 
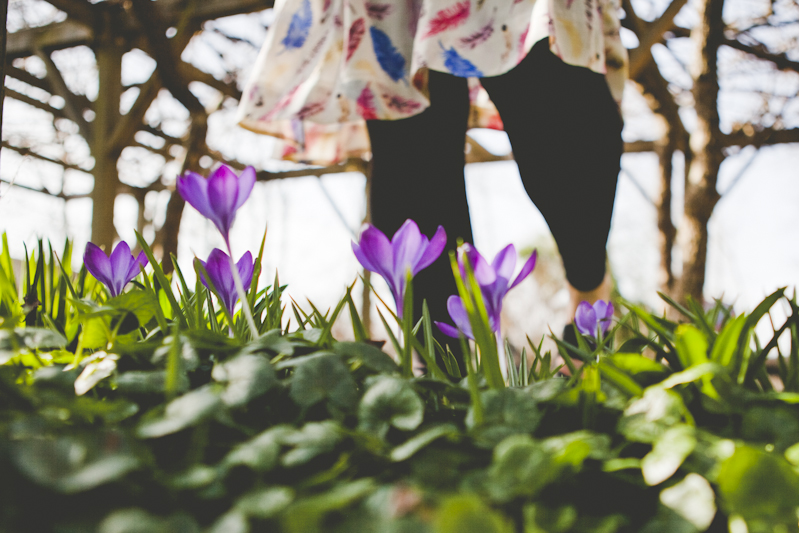
Notice the Beginnings

One of my self-care habits is to go to a local community garden at least once a month, all year.  For the past few months everything has been far past bloom: dried plants awaiting their trip to the compost bin, plots covered for the winter, everything settling into quiet until its time to emerge again.  Soon enough it will begin again though.

I especially like to go there in February and early March when the buds are just coming out again.  It feels important to witness the beginnings, the rebirths.  Sure, in months it will be in full bloom but seeing just one more plant starting to come up or little buds emerging onto cherry trees just soothes my winter heart!

You don’t have to go anywhere far to notice the beginnings either.  Look for them around your yard, or when you walk to the corner store!  Lets notice what is beginning anew both in the world around us…and maybe ponder what is beginning anew in ourselves too!  Of course get yourself in the photo with them too!

In the Alley

Get Outside for a Photo Walk (even If You Don’t want To)

This is the one I most need to tell myself! Some days it is really hard to get outside isn’t it.

But I know that even if I just go for a quick walk around the block with the sole intention of looking for things to photograph, I always come home feeling better.

In fact, it may be the days when we feel the most resistance to getting outside for a photo walk that we might most need it!  Alternatively, when the weather is too fierce, we might try taking a photo walk inside.

on the bridge

Check the Forecast

I think this is one of my favourite tips for you: Check the Forecast.  I know it sounds simple, but when people ask me “How do you get self-portraits with light in them when it feels like it rained all week” and that is the secret.  I take a peek at the forecast for the week ahead and sometimes even the hourly forecast for the day and note if I can make it happen to go for a photo walk or just be outside around that time.

I know this might sound a bit strange to some, but it has been SO helpful in both having me feel like it doesn’t actually rain ALL the time…and also to get photos with winter light in them!

winterinside

Get Inspired, Inside!

Sometimes getting outside just isn’t going to happen!  When it is absolutely pouring rain for days here, I just have to let go of getting outside and get inspired with what I’ve got…inside!

My favourite place to take photos inside is in my bathroom! Here are a whole bunch of tips on taking Bathroom Self-Portraits!

Of course, if you have lots of natural light in your home, that is dreamy to work with!  Get yourself near those windows of yours to take your self-portraits, even if the light isn’t as bright as it is in other seasons!

If you don’t have much natural light in your home, don’t quit.  Cause the truth is I don’t too!  If you’ve ever wondered why I take so many photos outside…it is because I live in a small apartment with not much direct light…so I usually go outside to get inspired.  But on those days it feels like too much to get outside to take photos, it can actually be really freeing to take photos inside!  A big bonus, is that you don’t need to worry if people are watching if you live on your own or if you don’t, find yourself a room (yes, like the bathroom) to close the door and take some self-portraits in and get playful taking your self-portraits!  Or invite those you live with (cat? dog? humans?) to join you in your indoor self-portrait!

doublesample800Get Creative with Your Photos!

So, after we get outside to take photos…what if they still feel not as vibrant as our summer photos?  Why not get playful with those photos and see how we can add some spark to them.

One of my favourite ways to process wintery photos is actually to make them black & white.  Or to make them into double exposures like the sample photo above! Its a great way to take two photos that might not excite me on their own, but together make me smile wide.  I made that double exposure in the Goldfrapp App, and you can read more about how I like to do double exposures in this post!

It can also be a great time to look back in your archives and play around with photos from other seasons that you might have overlooked at the time!

My favourite apps & websites these days for playing around with photos are:

So take that older self-portrait you might have overlooked before and take this wintery season to get creative with post-processing and bring that photo some new life!

I so hope these ideas help you get energized to take more wintery selfies!  If they do, please don’t hesitate to use the hashtag #beyourownbeloved if you share them on social media so I can find them and celebrate your wintery photo fun with you!

The Rebel’s Guide to Falling in Love with Photography

rebeltitle

warning1

The Rebel’s Guide to Falling in Love with Photography is about to begin.  This class is a rare class for me that isn’t focused on self-portraiture but it is focused on something super close to my heart: Playfulness.

For most of my life I had no interest in photography because it seemed mathematical, complicated and overwhelming.  It seemed like there was so much to know before I even began and that stopped me from trying at all.

Until…a time in my life appeared when I really just needed a creative tool to help me find my way back to feeling joy again.  I realized photography didn’t need to be technical or complicated.  In fact it could be playful & light.

So this class is derived from all of my favourite tricks that helped me fall head over heels in love with photography. One of my past students Johanna Harness said that:

Vivienne took all the rules that have been holding me back and replaced them with playfulness.  Worlds of possibility opened up for me.

That is my hope with this class too.  That all the rules or expectations that might be holding you back from falling in love with photography….well…we are going to break them and instead approach photography with a spirit of playfulness.   This class is perfect for total beginners and will also re-spark your love affair with photography that might have already begun but is feeling at a plateau.

So, I hope you’ll come join me for this powerful yet playful class.  Class starts in a week!

But first, for reals….I should tell you about some of the things that might happen in this class…don’t say you haven’t been warned!

rebel

rebel5

rebel3

rebel2

rebel1

rebel4

rebel6

rebel8

rebel7rebel9

Class starts next week, January 6th.

Grab your spot and join us for the class!