Category Archives: Photography

Possibility & Self-Portraiture

possibility3

I  know, self-portraiture can sometimes be a bit scary.

Because, there is so much unknown to it.

Will the same story I always see in my photos be reflected back at me?

Will it feel like proof of some of the stories I believe about myself?

Will I just feel ugly, or invisible, or not enough?

Or maybe we are just absolutely sure we know what the result of taking a self-portrait will be.  Because we only know the story we’ve always seen in our photos, one that feels like proof of the way we might feel about ourselves or our bodies.

For real, I get all of this.

Cause I’ve been there.

This is exactly how I felt at first and every so often I get a wave of it coming back at me.

Here’s the thing though.  

What it is so easy to miss when we are totally ready to see the same-old photos that we expect we’ll see…that we forget about possibility.

When folks join me for the Be Your Own Beloved class it is truly one of my favourite things to see, when they awaken to the possibility.

That we might, for the first time, see a photo of ourselves that we recognize with kind eyes.

That we might be wrong about not being photogenic, that we actually might not hate taking photos of ourselves.

That we might in fact be able to take photos of ourselves we feel really proud of, that make us feel seen.

That they can not only take photos of ourselves that we like, but that we might find our voice again.

That it isn’t about getting a ‘perfect’ picture. Its about creating space to let ourselves be witnessed, by ourselves & others.

It is possibility.

That doesn’t mean that we won’t also take those photos that tell those old stories.  The key is that when we are open to that possibility, we get both of those kinds of photos and we (maybe for the first time) get to really choose and take the reigns of how we get to see ourselves.

For me it was a turning point.  It made me realize that I knew in my heart I wouldn’t look back on this time in my life and especially in these photos with regret and wish my body was different, or that I was thinner.  But I knew that there was major potential for me to look back and regret not looking at this point of my life and choose to see myself with love.

I needed to start being a part of the visual story of my own life.

Yes, we might find ourselves taking photos that bring up our inner critic but we will also likely take ones that make us smile wide and we will be given the chance to choose self-compassion over self-critique.

So, lets open ourselves to the possibility of a new way of seeing ourselves.

Even if that feels scary (especially if it feels scary)

Even if we hate having our photo taken and self-portraits feel really vulnerable.

Even if self-compassion feels really far away.

I have a new session of Be Your Own Beloved coming up and I hope that if this resonates, you’ll join me.  This class isn’t created for people who already feel wildly confident and don’t struggle with seeing themselves with kindness.  It is for folks (like me) who have had the weight of a negative self-image on our shoulders for far too long and are ready for change.

It was created because these are the tools that I most needed at the point in my life when it felt like I was fed up with so much self-hate and was ready to find some ways to change that (and yes, it was terrifying).  I created Be Your Own Beloved because these are the tools I still need to strengthen and ground in a place of self-compassion each and every day.

I also wanted to share with you that there are a few changes ahead for the Be Your Own Beloved class after the February Session (don’t worry, the core prompts & structure are all staying the same…I’m just adding in some extra awesomeness) and there will also be a price change.  So if you’d like to take the class at the super affordable price of $49, this is your session!

I can’t wait to explore the possibility that will unfold in this class with you and am so excited to invite you into this experience of seeing yourself with more compassion!

10 Ways to take Better iPhone Photos (especially Self-Portraits)

iphone500

Before we dig into this, I want to say that I actually already think your iPhone Photos are awesome.

To me, its not about how fancy a photo we take, or how technically perfect it is.  Its that we pull out our camera and seek out things that inspire us.

This post isn’t actually about telling you what you are doing wrong.

It is about letting you know a few more tools you can do to make your photos shine.


Use the Camera included in the Phone (as opposed to an App)! 

Apps are awesome.  I wholeheartedly agree.

The challenge with Apps is that often they shrink down the quality of a photo.  My preference for taking photos with my iPhone is to use the camera included in the phone as it will save the biggest file size.  Not just that, but it actually has some great features that aren’t a part of Apps (and yes, I’ll spill all those tricks in this post)!

I usually tend to shoot in the in-phone Camera and then import it to whichever App I’d like to process it in!  This gives us the greatest creative control over our photo.

Not just that, but often the photo is taking much quicker using this camera.  Have you tried an app that feels like an old school point and shoot, taking forever to take the photo?  Especially if you’re trying to take a photo of motion, using this camera allows us to capture the photo much quicker (which might be exactly what you need to capture that one photo you love.


Explore Focus & Exposure in your iPhone!

You might already know this one, but when you touch the screen when in Camera Mode, you control both focus & exposure!  Yes, we can totally just hold our camera up and take the photo without choosing to play around with the focus & exposure, but it can be oh so fun and make our photo even stronger to do so! To play around with this, just touch the screen at different spots and see what happens.

A big part of the exposure of a photo on our iPhone is how it interprets light and dark in our photo.  To get to know this aspect of our iPhone camera even more, play around with touching really exposed parts (like the sky in a photo) or really dark parts (like a shadow) and see how it alters the photo as a whole!  If I’m looking to find something in a photo to define the exposure for it, I’ll often choose something in between light & dark, between black & white…often touching something on your screen that is green allows for a great exposure.

Again, there is absolutely no need to do this in order to take a great photo, but it allows us just a bit more control which can help take a photo from something that we ‘like’ to a photo we ‘love’!


Use the AutoFocus feature 

Now, there is an awesome feature to your iPhone camera that is really subtle (oh how I wish they boldly told you it was there).  It is the AutoFocus feature.

Here’s how it works.  If you put you put your finger on the screen of your in-phone camera you will see a yellow box appear where you are touching it and telling it to focus.  That itself is awesome and is the way to get a ‘DSLR-like’ photo with great aperture and blur in the background!

You can take it a step further and keep holding your finger there and what will likely appear is a little yellow rectangle saying ‘AF Lock’.  When that appears you have now locked in your focus.  This is SO fun as it allows you to move the camera around without having the focus change.  This can be great for getting Macro Photos and also for experimenting with doing intentional blur!


Explore both the Front & Back Facing Cameras.

You might already know this too, but those cameras on the front and back of your phone…they aren’t made equally!

The one that faces you as you are looking at the camera (and makes it easier to take arms length self-portraits) well, unfortunately, that one isn’t nearly as good quality as the one that faces outwards!

Normally, I still use the lesser quality camera but if you are finding that you’d like an even better quality photo (less noise or a less grainy look to it) try using that other camera!  If you had (or still have) an old school 3G iPhone, you’re probably well skilled at taking photos (and self-portraits) using that camera anyways.

Just something to remember if you’d like the up the quality of the photo!


Get that Phone Outside (and learn about light)!

This might be the most important one.  Photography is all about light and when we are shooting our photos indoors, we simply don’t have as much light to work with.

When we get outside with our iPhone, our photos will just naturally be a better quality…and that might make all the difference in how we feel about the photo!

Not only that, but when we take photos & self-portraits outside, we get to learn more about the ever-changing, incredible world of natural light (if you’d like to learn more, the Light Hunters class is all about just that..exploring & falling in LOVE with Light)!


Look into the Lens!

I think often when taking self-portraits this can make such a big difference in how we see ourselves in a photo.  Yes, the lens on an iPhone is little and hard to notice sometimes, but when we look into it…we engage in our photo.

That little detail often makes SUCH a big difference!


Explore HDR 

I thought HDR was kind of cheesy (and still think it is sometimes) but that HDR feature on your iPhone…its actually really cool.  It takes 2 photos at a time and then layers them to make your photo even crisper, even richer.

This can be so fabulous for landscape & outdoor photos but it can also be amazing for self-portraits and portraits too.  It also saves 2 photos to you camera (so you can always pick the non-HDR photo if you’d like) so you have lots of options.  Using it regularly does make our storage fill up quicker (as there are double the photos) but often it is SO worth it!  It does a way better job than the ‘HDR-ish’ feature on Instagram so if you have preconceived notions of HDR being cheesy (like I did) I recommend putting them aside for a bit and getting playful with this feature as it has helped me take even stronger photos!


Find What ‘Grip’ Works for You!

Another reason we might not love a photo is if it is a bit out of focus.  Often that can simply be that our hands shake as we are holding it.  So taking a bit to ponder what kind of camera grip works best for us can really help that.

Do you want to hold it with one hand and click the shutter with the other?

Do you want to hold it so you can press the shutter with the volume button (and did you know that was an option)?

There are lots of different ways to grip your camera to make it more stable for you (and you can also get a small tripod for it if that helps too).


Put Your Camera Down and Step into the Frame!

With any camera, including an iPhone, being behind the photo is oh so fun…but when we step in front of the screen something powerful happens.  We can be both the photographer and the subject.

Taking arms length photos is fun & fabulous but when we set a timer (like using the Gorillacam App for iPhone) we get to let go of the camera and let our whole selves into the photo.  For me this was pivotal in terms of using self-portraiture as tool for healing body image.  Letting go of the camera allowed me to really be in my body and take a moment to ground, or move.  This made ALL the difference in the way I saw my photo.

Oh, and I know this an iPhone-focused post, but for those of you with Android Phones, you actually don’t need an Android version of Gorillacam as there is actually a built in timer!  I don’t know all the features of Androids (as I don’t have one) but from helping people learn about their Androids in workshops this fall, I discovered that there are a lot more amazing features to your phones too than you might know…be sure to check the settings button to see what awesome features your phone has!


Use it to its Capacity (and Take LOTS of photos)

Yes, you might be thinking…if I just get the newest iPhone, that will have me able to take better photos! While it is true that the camera in the iPhone improves with every version of it, if we focus on the quality of the camera as being the only thing that takes a good photo, we are wrong…you take a great photo.

So with all camera gear including iPhones, I think there is great value in using it to its capacity.  Get to know all these features, take lots and lots and lots of photos, keep shooting, keep experimenting, keep learning about light, keep getting outside, keep seeking new things to capture, keep turing the camera on YOU to tell your story.

The more photos we take, the more we will get that one we love.  If we discount our skill or our value on just one photo (espeically when in comes to self-portraiture), we miss out on the opportunity to keep developing our photographic eye!


Yay! I hope that makes you want to run outside right now & experiment with your iPhone! If you do, be sure to tag #beyourownbeloved on Instagram if it is a self-portrait or tag me @viviennemcm to see a photo inspired by this post (as I’d love to cheer you on)!

Happy iPhone Adventuring!

Oh…and if you are interested in learning more about taking better photos with your DSLR too, come check out the Beloved Camera E-Book!

compassion600

Portrait Session with Hannah Marcotti {and an announcement}!

Hannah Marcotti
A few months ago I got the chance to do a little Portrait Session in the forest with the lovely Hannah Marcotti!

I’ve been admiring Hannah’s amazing work for a while now and it was so lovely to the chance to channel her spark through the camera.

Ever since Be Your Own Beloved became the focus of my work I’ve been doing far less Portrait work but behind the scenes I’ve been working on a new portrait offering that embodies the Be Your Own Beloved message and offers you a portrait session different from anything else out there!

The offering is called the Beloved Sessions and its now available!

I so love getting to have someone else step in front of the camera and capturing the radiance I see in them through the lens…sometimes a big gift of self-compassion we can give to ourselves is seeing our beauty and spark through someone else’s eyes.

As a portrait photographer this is my hope, that they will see themselves perhaps in a way they haven’t before.  What is truly unique about this portrait session is that we explore the tools that make self-portraiture so empowering and use them in our portrait session to create an experience in which you feel embodied and able to let yourself shine!

This is also an opportunity to get a one-on-one Be Your Own Beloved experience with me and ask any questions you have!

So of course, here are some of my favourite photos from our forest photo shoot!

Hannah MarcottiHannah MarcottiHannah MarcottiHannah MarcottiHannah Marcotti

A Forest Photo Shoot {Behind the Scenes}

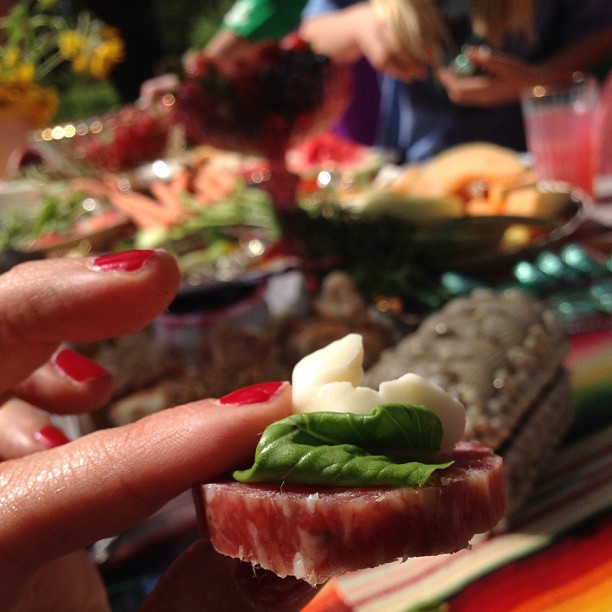
A little behind the scenes sneak peek of a photo shoot adventure for #amulet magazine today. We feasted on this soon after!

Yesterday I went on a bit of an adventure to meet up with some folks in Washington State to gather, feast and photograph.  The intention behind this day being to use some of the photos in an upcoming issue of the amazing magazine Amulet (its a pretty breathtaking magazine isn’t it)!

What I love about gatherings that are also photo shoots is that while on one hand I have a task of photographing the experience, it seems to always end up being a beautiful experience of gathering together, sharing incredible food and exploring a pretty stunning location.  Earlier this year I gathered with some folks for this dreamy beach photo shoot.  For this one we adventured eastward over snowcap mountains to a beautiful park in the middle of Washington State and found this spot in the woods to shoot.

While of course the DSLR photos are saved for Amulet, I wanted to give you a behind the scenes sneak peek (iPhone style) of this shoot!

Feasting in the sunshine.Todays magic makers! @amuletmagazine @mamaspace @smashingrubbishHula hooping in the forest!


Lets talk about Gear!

Photo by Andrea Scher

I often get emails asking about what gear I’d recommend, so I thought today was the perfect day to share what I use and why!


Cameras

Canon EOS Rebel

I started my photo journey by buying a Canon Rebel, as it seemed like the camera that many photographers I admire used at the time.  It was a really good choice and definitely a camera I’d recommend for anyone wanting to explore photography further, beyond a point and shoot.  The newer versions are far more advanced than my camera was with way more options in terms of the photo timer (which is oh so important for selfies of course) and they usually also have video now days which is a big bonus.

I used this camera up until 2011, so it was the one I’ve used for so much of my photography.  I only upgraded because I was starting to shoot weddings and needed to be able to take higher quality photos than a 4 year old camera could provide.  I also felt like I was ready for a full-frame camera.

In a way, I felt proud that I didn’t upgrade my gear until then.  It allowed me to see that my creative expression could be done with any camera, any gear, even an old one.   Getting new gear was helpful but I didn’t feel like it made me a ‘better photographer’ and I’m glad I stuck with my old gear for so long so I could learn that.  Plus, this photography thing is pricey!  I think making your gear last as long as possible is pretty darn smart!


Canon 6D

My jump from the Rebel to a new camera was a pretty big jump.  My defining reason for switching to this camera rather than any other model was that I wanted to be able to shoot full-frame.  Essentially what that means is that it has a bigger sensor so it makes more use of the lenses that I’ve got.

My first switch to a full-frame camera was to the Canon 5D Mark II and then a few years later I switched to the Canon 6D. There were a few reasons I made the switch, some technical issues with the Mark II, but also the 6D had much better video and wifi. Plus, the Canon 6D is much more affordable but is still an incredibly high quality full-frame professional camera. I’m beyond happy with the 6D and would choose it again over a the other full-frame options. There is now a Canon 5D Mark III available but I’d still choose the 6D. I’m that in love with this camera, it has everything I need out of this genre of camera.

Plus, the camera body is only one element of gear. The lenses are equally, if not more important!


Lenses

Oh lenses.  Choosing the right lens for you is an incredible way to make your visual voice sing loudly.  I use 3 lenses in particular for all of my photography needs.    I feel like I have found the triad of lenses that really works for me.   I also usually rent lenses if I have needs beyond what I can do with my gear.

Canon 50mm f/2.5 Compact Macro Lens

My love of photography and finding beauty really started with a love for shooting Macro.  I think its part of the cycle of seasons here (as it is just now spring) where when the flowers start appearing after a grey winter, I just want to stop and photograph each and every one.   The macro lens I use is the Canon 50mm 2.5 Macro lens.  Another big reason for getting this lens was that it was the one recommended for doing  TTV photography.  This lens allowed me to take wonderful portraits and I still use it to this day.  It is also pretty affordable (compared to the wild and crazy expensiveness that lenses can be) and not too heavy.

Canon 50mm f/1.4 Lens

A few years ago I added a new lens to my crew, the 50mm 1.4 Lens, with the intention of using it as a portrait lens.  I knew there was a slightly more affordable version (the 50mm 1.8) and a super expensive one (the 50mm 1.2) and this felt like the right fit for me.  It allows you to take portraits with really beautiful bokeh as it has that wide openness.

This lens is definitely my every day lens. The next lens I’m going to share with you is the most versitile one and the one I use almost completely for photo shoots, but that lens is, well, fricken’ gigantic and super heavy.  The 1.4 is really small and so beautiful so it most often is the one that accompanies me on photo walks.

Canon EF 24-70mm f/2.8L Zoom Lens

This is my new love.  I knew when I bought it that it would be my last lens purchase for a while (its a mighty expensive one) but that it would meet so many of my photo needs that I wouldn’t be looking at any others for a long while.

As I mentioned, this is the lens I primarily use for photoshoots.  It is wide (especially on a full-frame camera), has beautiful bokeh (which is obviously a big thing for me) and is a zoom lens so it has much versitility.  I tend to say “its one gorgeous piece of glass” and it is.  It allows me to get more of the setting into a portrait but still have beautiful bokeh and clarity.  It is seriously heavy (especially on a pretty big camera) so I only tend to bring it on photo walks when I know I’ll be taking self-portraits, as it allows, like with the portraits, to get more of the setting into the photo.  I only got it a year and a half ago so many of the more recent self-portraits (and all of the recent portraits) are taken with this lens.

I’ve had the 3 lenses for years and haven’t felt the need to get any other lenses as they meet all my needs!


Renting Lenses

I’m a big fan of renting lenses (and it is way more affordable than you might think!

One lens that I don’t own, but that plenty of my photos are taken with is the Canon 70-200mm f/2.8L IS II Telephoto Zoom Lens.  It is a beautiful and even more gigantic lens that allows you to take really dreamy photos from pretty far away.  I adore this camera for concerts or for folk fest.  I still get really close to the stage to get photos like these, but it allows me to focus in on the musicians hand and take really lovely closeups.  That said, I haven’t felt the need to buy this lens as I use it only for folk fest or for a wedding.

In Vancouver we are lucky to have the fabulous Beau Photo, which has a great rental department.  What rocks about Beau (along with being really kind and not intimidating or snooty like some camera stores can be….especially to women photographers) is that they are closed for the weekend, so when you rent a lens you get it for the entire weekend (Friday-Monday) for the cost of one day.  That means most of the lenses I have rented are in the $20-50 range for the whole weekend which is really amazing.  Paying this once or twice a year is absolutely worth it to me, rather than buying a super heavy lens that I’ll only use occasionally!  I definitely recommend finding out if your local camera store has a rental department and you might be surprised by the affordability of renting lenses.  I definitely tried out the 24-70 before buying it and lots of other lenses that I thought I wanted but once I tried them, realized they weren’t the right fit for my needs.

For those of you in the states, I also hear good things about BorrowLens, but being in Canada, I haven’t tried them myself!


Other Cameras

I actually have cameras all over my house, some inhereted vintage ones and a wide variety of simply cute thrifted ones that don’t work!  I thought I’d share a bit about the ones that I do actually use, namely the polaroids.

Polaroid SX-70

You’ve probably heard of the wonders of the Polariod SX-70.  It is such a beautiful camera, both aesthetically and in the photos it takes!  Unlike any other polaroid cameras, it allows you to shoot with manual focus and create a beautiful depth of field in your photos.  This camera truly makes me swoon.  They can be pricey though (as in $150+) so keep your eyes open for garage sale and thrift store scores!  I use the SX-70 for a variety of photos but it is by far the best polaroid to take portraits with so I always have it alongside my digital gear for Weddings.

Polaroid Spectra

The Spectra camera is a bit of a funny looking camera, but its misguiding as it is truly an incredible camera.  The 2 factors that make it so amazing are that it has a timer and that it allows you to double expose.  It also takes these gorgeous rectangular polaroids which are so much fun to shoot.  The camera itself can be scored for way cheaper online or in thrift stores.  I have only had one of these cameras (unlike SX-70’s which are really finicky and I’ve gone through a few of them).   I primarily use the Spectra for self-portraits, double exposures and for street photography style photos.

Polaroid Land Camera

This camera is a bit less used in my world than the other 2 Polaroids, but not out of any lack of love for it.  It takes Pack Film, which is oh so incredible.  The version that I have is a bit less pretty than the other foldable versions but I chose it intentionally as it takes AA batteries.  I know myself and that tracking down an old battery for one of the other versions of the Land Camera is just unlikely to happen, so to have contemporary batteries felt important.  This version doesn’t fold and is more plastic based but it really does take lovely pictures, especially street photography style photos.


iPhone Camera

When I first got an iPhone a few years ago it swiftly became my point and shoot camera…having it with me at almost all times, ready to be taken out to capture the unplanned moments of photo-goodness.  My first iPhone was a 3Gs and like my first DSLR, I used that one until I could no longer and then just a couple months ago upgraded to the iPhone 5.  The camera is undeniably better (especially with such a big jump between models) and I feel like I’m still learning things about how to make the most use of it.  Between the way it allows you to shoot macro or do a fixed focus, as well as shoot panoramas and HDR (which I usually don’t like the look of, but am having fun experimenting with)!

Within the iPhone, the gear or apps I use the most these days are:

Gorillacam (free and allows you to set a customized timer)

PicTapGo (loving this new app and the ways it allows you to process your photos)

Instagram (of course)

Hipstamatic (their new lenses and double exposure options have me hooked)

Flickr (loving how easy the new version of this app makes it to add my photos to my flickr account)


Point and Shoot Cameras

You might notice this category has been left out so far!  That is because I don’t actually have a point and shoot.  That is absolutely what I started exploring photography with and think they are the bees knees.  I fell in love with Macro shooting with a point and shoot and was amazed at the quality of shooting macro with them (a big plus).  That first camera got stolen in one of my unfortunate robbery experiences and I never replaced it.  I feel like at this point my iPhone has become my point and shoot.  They also have the potential to shoot video of course, with is a big bonus.


Other Photo Gear I use:

Gorillapod

I love the gorillapod!  What a brilliant invention.  Its easy enough to carry around on a photo walk and is pretty sturdy.  I love that you can get them in all sorts of sizes (for different cameras).

Manfroto Tripod

I actually have 2 Manfroto Tripods.  The first I bought years ago when just starting to take photography classes at the college nearby.  I invested and bought a gorgeous tripod.  Truth be told, its gigantic and heavy and I don’t use it as much as I’d like to (in terms of use vs cost).  This year I did buy a much lighter and much cheaper version at Target.  I love how I can actually put it in my backpack when travelling and it is sturdy enough for what I need it for (taking selfies and shooting video).  I’m glad I have both and buying a tripod is much like buying a camera or lens…you really need to figure out what your intended use is to buy the right gear.

Lyric Camera Bag by Epiphanie

Ever since the trend of stylish camera bags has appeared, I’ve been hooked and have tried out a number of them, but my absolute favourite and most used one has been the Lyric Bag made by Epiphanie.  So many of these camera bags (even some from Epiphanie) are, well…frickin’ gigantic and not really ideal for everyday use.

The Lyric is dreamy and I will often just take out the padding and use it as a full purse (or even put my computer in it) and then can easily put the padding back in and make it back into a camera bag again.  It will definitely fit my usual photo walk gear which is often my camera (which is big) and both the 50mm 1.4 and the 24-70 lenses.  There is usually still room in there for a water bottle (for when my photowalk is actually a big hike), my wallet or even adding my SX-70 in there!

I also have another older Epiphanie bag (that they no longer sell) that is much bigger but works well for travelling!

The best camera is the one that’s with you – Chase Jarvis

I do truly believe this quote…that the best camera is the one that you have with you and that gear doesn’t make you an amazing photographer, you do!  So lets get out there and playfully capture the world around us with whatever gear we’ve got!

I do hope that has been helpful though!  I’d love to hear about your favourite lens or gear and I absolutely welcome any questions you might have!