Category Archives: Behind the Photo

To Tell You the Truth

I want to tell you the truth.

More truths.

The ones behind the photos.

Because as healing as it is for me to take 50 photos and get one that truly makes me feel empowered, I’m realizing how much it might be helpful to share the ones in between with you.  The unflattering ones, the hilarious ones, the ones I never used to share.

I want to demystify this process of self-portraiture, of the process of learning to see your own beauty though photography.  Your response to this post where I shared the story behind a new photo and how I chose to transform it rather than delete it.  Well, it was a bit of an epiphany for me to realize how helpful it could be if I shared more like these.

I’m ready to share them, the ones in between that I would never have shown you before, but that now I feel brave enough to.

I want to share more of the befores than the afters.

So that when you get one that you don’t like, that you know its just part of the process.

So be prepared for more of this behind the scenes self-portraiture truth-telling.

Starting today, starting now, over at Kind Over Matter I’m sharing some of those images and some thoughts on self-image.

I wanted to share this one with you today too…as it cracks me up (and its good to laugh at yourself)

Because really, when you’re shooting with a remote and you’ve got to think quick, what do you do?

You either drop it, keep it in your hand, or put it somewhere, in this case in my mouth!  So here, is the before for today’s main image!

Behind the Photo: Working with ‘Bad Light’

One of the things you learn pretty quickly living in a city with a really grey winter is how to work with the light you’ve got.  I notice in my Light Hunters classes that people often talk about waiting for the light so they can take their photos.  That is until they realize that there is oh so much potential in light that we might not normally think of as ‘good’.

We can really strengthen our relationship to light and to our photographs if we learn how to rock light of all sorts.

So I thought I’d share with you one of my tips for dealing with photos, especially self-portraits, in light that you might otherwise brush off as ‘bad light’.  I know I did!

One of my favourite cafe’s to work in has a bathroom with green light and the most yellow light imaginable.  I tried taking a self-portrait there and oh my…was not enjoying with how yellowy it was.  But the charm of shooting with an iphone is that you can get playful with your photo really quickly and transform it before you can delete it!

I’ve also lived in apartments for all of my time in Vancouver, that though I loved them, had undeniably bad light.  Very little natural light at all, and pretty much none in the bathrooms (which is of course where its mighty fun to take self-portraits).  That is why almost all of my photographs end up being taken outside and why I’m such a fan of the art of the photowalk, because I simply don’t have any dreamy light pouring into my place as I’m sipping my morning coffee.  So I’ve got to go find it.

Or make use of what I’ve got!

Here are the two ways that are pretty easy to transform photos with ‘bad light’ (I really hate to call any light bad, but well, it just doesn’t compare to really good natural light) into something good.  The examples are all with iphone photos, but of course you can absolutely do this with digital images as well.

Turning a photo into black and white helps us get rid of not so lovely light so easily by just taking away the yellow or green tones (or whatever the challenging light may be) but leaving us with the light and shadow.

I’m a big fan of using the Apps Pictureshow and VSCOcam to play around with turning photos into black and white but there are so many options you can work with.

With most point and shoots and DSLR’s somewhere in your menu you likely have the option to shoot in black and white.  I often use that if I’m shooting somewhere where there is really strange light.  For example, concerts where there are a big array of colourful lights happening or for indoor yellowy light, why not just start by shooting in black and white!

Another great option for dealing with ‘bad light’ is to change the white balance!  For the first few years of my photo adventures I didn’t know how to do this, but with all the Apps and tools available now days it is pretty easy.  You can change the white balance or colour temperature in programs like Lightroom or Photoshop, but you can also explore them in iPhone Apps like VSCOcam.

You may also just notice the white balance change if you use a program like Instagram on an iPhone.  A photo can look so different between each of the effects and a big part of that is the colour temperature.  You might notice how some of them have more blue tones, or red tones.

So, we can notice how certain apps or effects change the white balance or the colour temperature, and we can also do it ourselves!

VSCOcam has a colour temperature option that looks like this:

Pictureshow (my favourite one to process with) doesn’t have a white balance option, but it does have the options to change the colour, of the photo.  In order to shift a colour, we can think of the colour wheel  to shift the tone of the photo.  Or we can just play around with the dials until we change the colour temperature to something that works for us (my preferred approach)!  The colour screen for Pictureshow looks something like this:

Of course, this is also easily done for our digital photos as well.  PicMonkey has lots of great options for playing around with black and white and colour temperature.  If you haven’t tried PicMonkey, do know its oh so easy to use and allows for lots of playful creativity.  I wanted to point out that cool ‘Neutral Picker’ option in the colour section.  It allows you to adjust the ‘White Balance’ for a photo and change the colour temperature.  Just go try it…its oh so easy to do!

I hope that this all helps you transform some photos that you might have thought weren’t in very good light into something entirely different!

Behind the Photo: Choosing to See Beauty

The other day, I went out into the pathway behind my house in my red boots to take a photo.

I shot a whole variety of photos within a few minutes, with people walking by on the sidewalk behind the path.  When I finished, I checked out the collection as a whole.  Some were blurry, some too close, and a lot of them made me smile.

The above one was my favourite.

But there was a moment where it could have gone the other way.

I wanted to share this photo with you and tell you a little bit about the story behind it.  The story that could have been and the one that I chose.

You see, the original photo didn’t look like the one above.  It is this:

A sideways angle, a flowy shirt and a happy belly (that just had some dairy which it doesn’t digest well and gets bloated) and simply the shape of my body, led to a photo that could have easily been deleted if I focused only on the not so flattering parts.  I actually feel more comfortable in my body than ever these days and am not ashamed of my curves, but it is still vulnerable to share this photo.

Because it is vulnerable taking self-portraits.

Its vulnerable seeing ourselves in photos.

Its vulnerable being human beings for goodness sakes!

But, one of the skills self-portrait photography has taught me is that I always have a choice.  I have a choice to take more photos until I get the one I feel good about.  I have the choice to transform a photo by cropping it creating the result of a photo that holds positive energy for me, rather than negative.

Do we want to focus in on seeing the negative, or do we want to transform it into something that makes us feel sassy, even beautiful?  Because the cropped version of this photo absolutely makes me feel that way.

I normally don’t share photos that are outtakes like this, but I wanted to as I feel like the story behind the photo could be useful if you’re wanting to take self-portraits but feeling vulnerable about it.

Or in case you have a photo you might have written off because of part of it, that you transform and re-write into a new story with by cropping it.

Or in case you’re craving to join me for the next session of Be Your Own Beloved or Beloved Beginnings, I wanted to share this story with you.

If you have a photo that you’ve taken where cropping transformed a negative story into a positive one (or a time in life, when a choice you made had that effect), I’d love to hear your story!

Nextbyobeloved

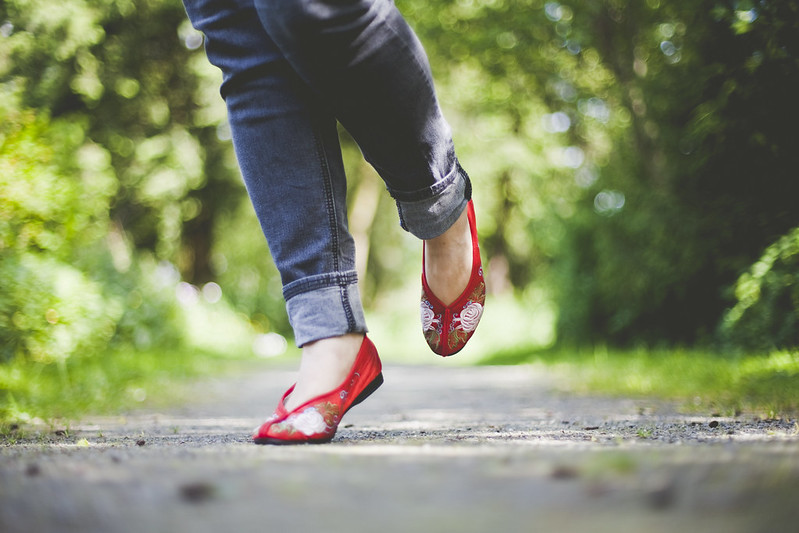
Behind the Photo {Shooting from the Ground}

red shoes dancing

During my courses, I welcome questions about the technicalities of taking photos, even if the course isn’t technical (YAYOM is the course that covers all sorts of technical info in an accessible way).

Often it comes through with the question ” How did you get this shot?” in reference to a specific photo.

So I wanted to start a bit of a feature here exploring some of the ways to get self-portraits (and other photos) with all sorts of camera gear. I’ll also be telling it like it is and share how quite often I just use what is at hand, including propping my camera on a garbage can or using make-shift gear like your bike seat as a tripod). I’ll tell you some of the stories of how I got a certain photo…so if there is a photo or a type of shot you’ve been wondering about, don’t hesitate to ask!


One of the most spontaneous ways to shoot a self-portrait is to just put your camera on the ground!  So I thought where better to start but from where we stand.

Shooting from the ground is pretty simple.  I usually bring along a scarf and put my camera on top of it to protect it.  You could also put it on top of your camera bag (though as you’ll see when you try it out, a photo a foot off the ground often looks much different than right on the ground).

Shooting from the ground invites a whole cast of potential characters into your photo with you:


I find it really invites me to look for potential spots on the ground, which is something I might overlook normally.  It gets us to shoot from a whole new perspective.
Some questions I often get around these photos tend to be about how to get them focused where you are standing.  The easiest way is of course using a remote.  That way you can just put your camera on the ground, stand in front of it, press the remote and your camera will focus on where you are standing and take the photo.
Of course, quite often, I am out strolling with my camera without my remote.  You can absolutely still get a great shot without it.  When recommending shooting with only your camera timer, I usually recommend standing near something that the camera can focus on.  That doesn’t always work for me when shooting from the ground.  So here are some great options:
  • Shoot close enough that you can stand where you want to and have the camera facing you.  Then just reach over and press the button!  This would be a great option for a point and shoot or DSLR
  • Use your manual focus to pick a distance.  I usually note the distance away in feet and just count out the steps away.  This can be a bit hit or miss but is the way I do it most often.
  • I also usually shoot with a really really shallow depth of field (oh beloved bokeh…i’m addicted to you) so it makes it even more challenging as I’m giving myself a really narrow point of focus as you can see in this photo above.  You can also just try making it a bit less depth of field (a narrower aperture) to give yourself more of an area to be near the point of focus.
  • Embrace the mistakes.  I love photos that end up a bit blurry.  So if you mistake the distance away using the above technique, keep it!  You might find you love it.


I hope this is helpful!  If any questions about shooting from the ground arise, ask in the comments!  Or share your favourite ‘Shooting from the Ground’ Photo…just link to it in the comments below!